
- Creating and Publishing a Form
- Conversational Form
- Create Multi Step Forms In WordPress
- Using Calculations in SureForms: A Step-by-Step Guide
- Calculation Formula Guide
- SureForms Login Block – Step-by-Step Guide
- SureForms Registration Block – Step-by-Step Guide
- SureForms – PDF Generation Feature
- GDPR Compliant Forms
- Create WordPress Forms With Conditional Logic
- Adjust Form Notification Emails
- Form Confirmation
- Entries Management Feature Guide
- How to Add Query Parameters to Form Redirects
- How to Fetch Query Parameters from URL
- Set the “From Email” in SureForms
- Setting Up “Reply-To” Email Using Form Input Tags – SureForms
- Restrict Form Entries in SureForms
- Form Scheduling in SureForms
- Conditional Confirmations in SureForms
- How to Connect Your Stripe Account with SureForms
- How to Connect PayPal in SureForms
- How to Create a Payment Form in SureForms
- SureForms Payments
- How Refunds Work in SureForms Payments
- Understanding Payment Processing Fees
- How to Display the Payment Dashboard on the Frontend (SureForms)
- Enable One-Time Payment and Subscription in a Single Form
- SureForms Integration with ActiveCampaign
- SureForms Integration with AgileCRM
- SureForms Integration with Airtable
- SureForms Integration with LatePoint
- SureForms Integration with FluentCRM
- Connect SureForms To Zapier
- WordPress Forms with the Custom App Builder
- SureForms Integration with Telegram
- SureForms Integration with Breeze
- SureForms Integration with Brevo
- Unable to Upload SureForms ZIP: File Unzipped On Download
- Browser Support for SureForms
- Not Getting Update Notifications
- How To Rollback to Previous SureForms Versions
- Publishing Failed: Invalid JSON Response
- Troubleshooting Email Sending In SureForms
- SureForm Submissions Marked as Spam – How to Fix
- API Request Failed – Nonce Verification Error
- Fixing the “Destination folder already exists” Error When Installing SureForms
- How to Set Up SureForms with Caching Plugins
- srfm_enable_redirect_activation
- sureforms_plugin_action_links
- srfm_quick_sidebar_allowed_blocks
- srfm_integrated_plugins
- srfm_suretriggers_integration_data_filter
- srfm_form_submit_response
- srfm_enable_gutenberg_post_types
- srfm_languages_directory
- srfm_form_template
- srfm_disable_nps_survey
Upload Form Files and Signatures to Amazon S3 with SureForms
SureForms allows you to automatically upload files and signature submissions directly to Amazon S3. This integration helps you securely store uploaded documents in cloud storage instead of relying only on your website server.
Whether you’re collecting contracts, resumes, signed agreements, identification documents, or other uploaded assets, Amazon S3 integration provides centralized, scalable, and organized storage.
Benefits of Using Amazon S3 Integration
Using Amazon S3 with SureForms offers several advantages:
- Reduce storage usage on your website server.
- Store uploaded files securely in Amazon S3.
- Automatically organize form uploads into folders.
- Access uploaded files from anywhere.
- Keep uploaded documents and signatures together.
- Simplify document management across teams.
- Create a reliable backup of important form submissions.
- Benefit from Amazon S3 scalability and high availability.
Prerequisites
Before you begin, make sure you have:
- SureForms installed and activated.
- An AWS account.
- An Amazon S3 bucket.
- AWS Access Key and Secret Access Key.
- A form containing either:
- File Upload field
- Signature field
- Or both
Step 1: Connect Amazon S3 in SureForms Settings
The Amazon S3 connection is configured globally and can be reused across multiple forms.
Navigate to Integrations
- Go to SureForms → Settings.
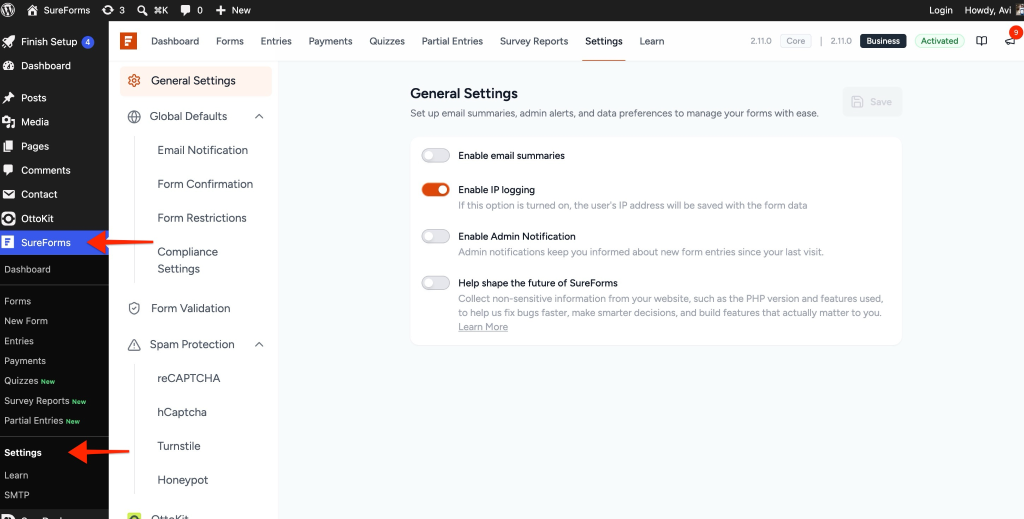
- Open the Integrations tab.
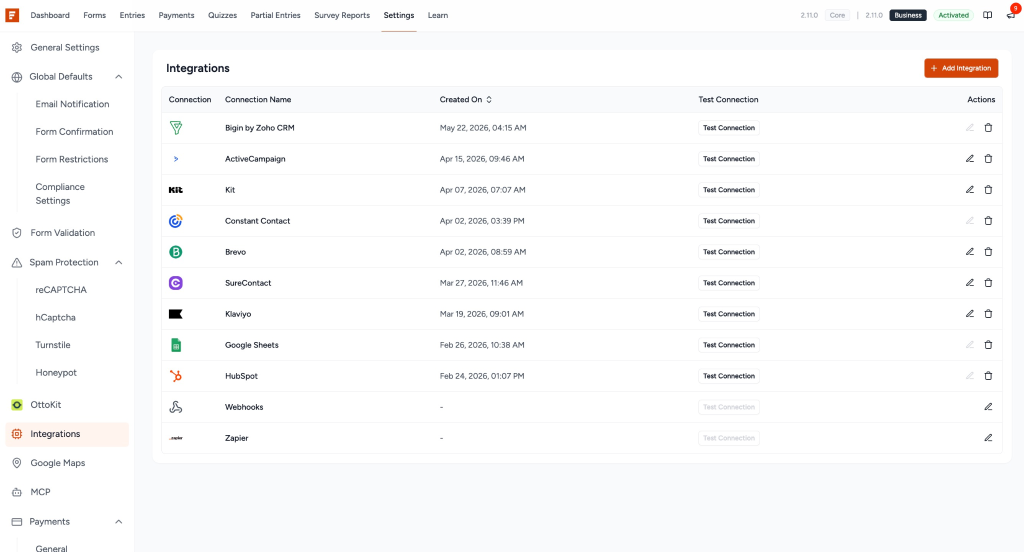
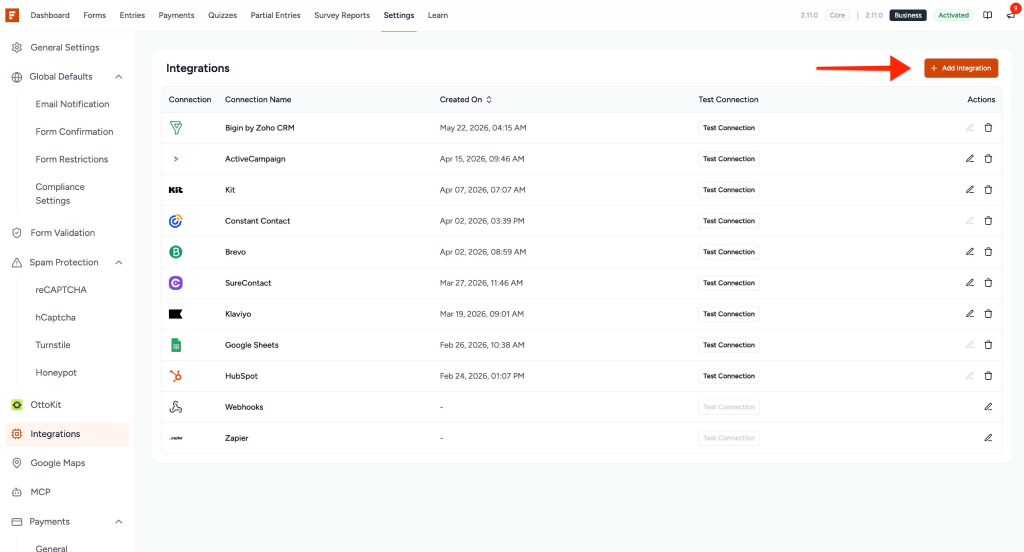
- Click Add Integration.
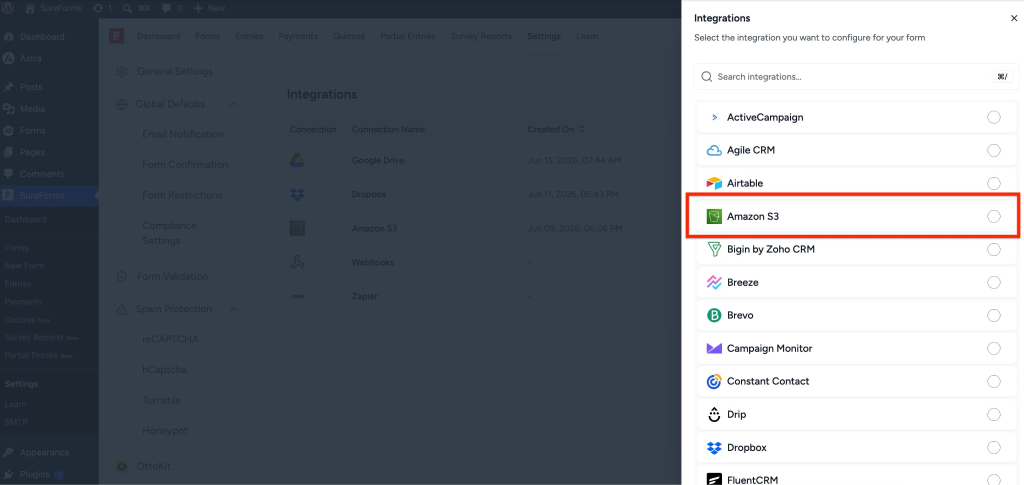
Search for Amazon S3
- Search for Amazon S3
- Select the Amazon S3 integration option.
Configure Amazon S3 Credentials
Amazon S3 requires AWS credentials to establish a secure connection.
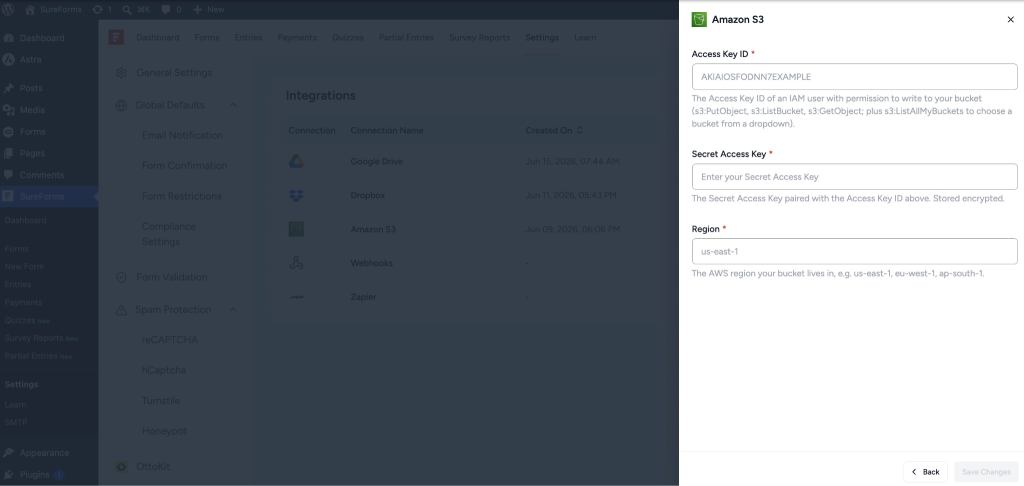
Step 1.1: Create or Select an S3 Bucket
Log in to AWS Console.
- Navigate to: Amazon S3
- Create a new bucket or select an existing bucket.
- Configure:
- Bucket name
- AWS Region
- Access settings
Step 1.2: Create IAM User and Generate Access Keys
- Navigate to IAM → Users
- Click: Create User
- Enable programmatic access.
- Assign appropriate permissions.
Recommended permission:
- AmazonS3FullAccess
or - Bucket-specific access permissions
Create credentials and copy:
- Access Key ID
- Secret Access Key
⚠️ Important: Store the Secret Access Key securely. AWS displays it only once.
Step 1.3: Add Credentials in SureForms
- Return to SureForms → Settings → Integrations
- Open the Amazon S3 integration.
- Enter:
- Access Key ID
- Secret Access Key
- AWS Region
- Click Connect.
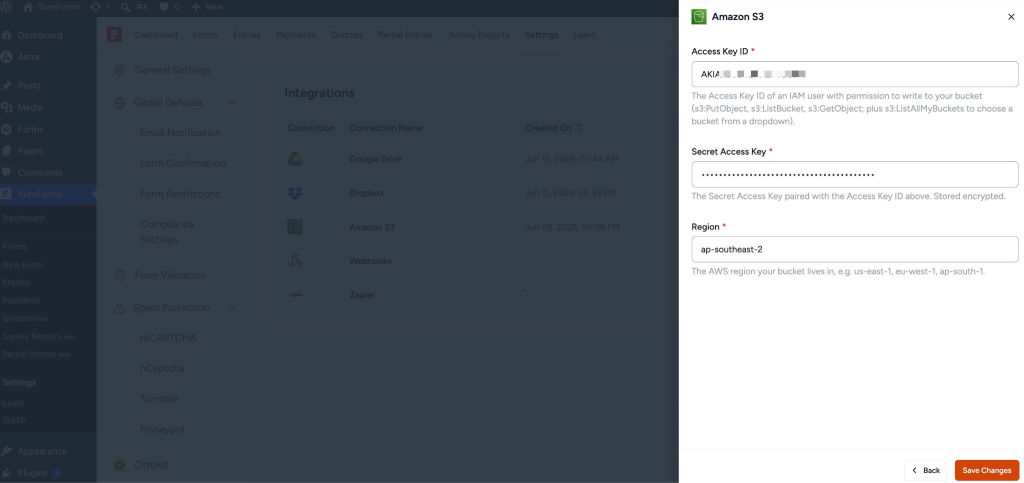
Once connected successfully, you’ll see:
Integration configured successfully!
Amazon S3 will now appear in your integrations list.
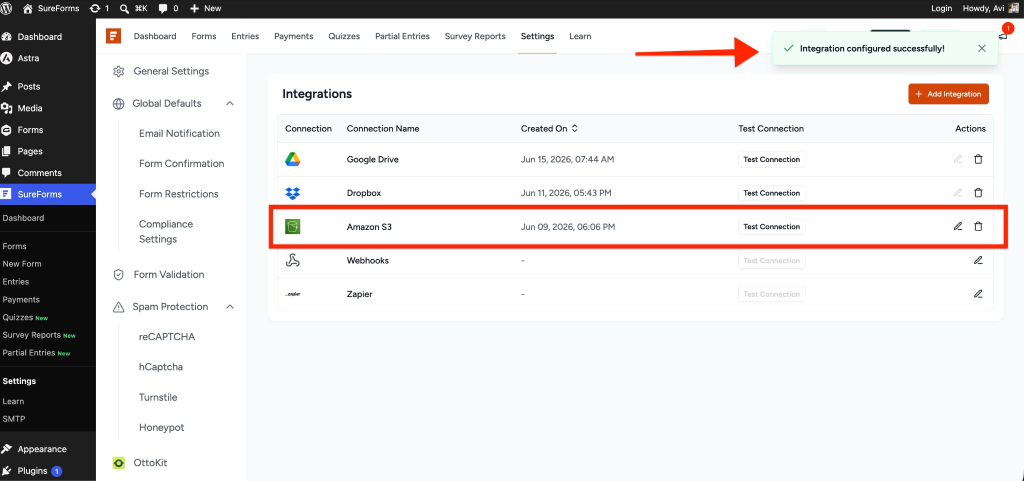
Step 2: Create a Form with File Upload or Signature Fields
To send files to Amazon S3, your form must contain at least one supported field.
Supported fields:
- File Upload
- Signature
Add a File Upload Field
Create a new form or edit an existing form.
Add a File Upload field.
Configure:
- Allowed file types
- Maximum file size
- Number of files allowed
Since uploaded files will be stored in Amazon S3, configure limits according to your requirements.
Add a Signature Field (Optional)
If your workflow includes collecting approvals, agreements, or consent:
Add a Signature field.
Captured signatures can also be uploaded automatically to Amazon S3.
Step 3: Configure Amazon S3 at the Form Level
After creating your form, configure the upload workflow.
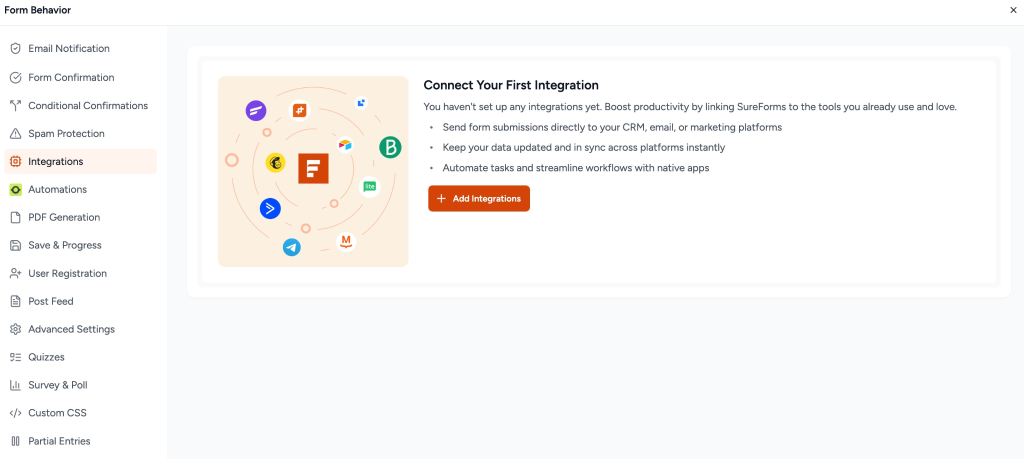
Open Form Integrations
- Edit your form.
- Navigate to Form Settings → Integrations
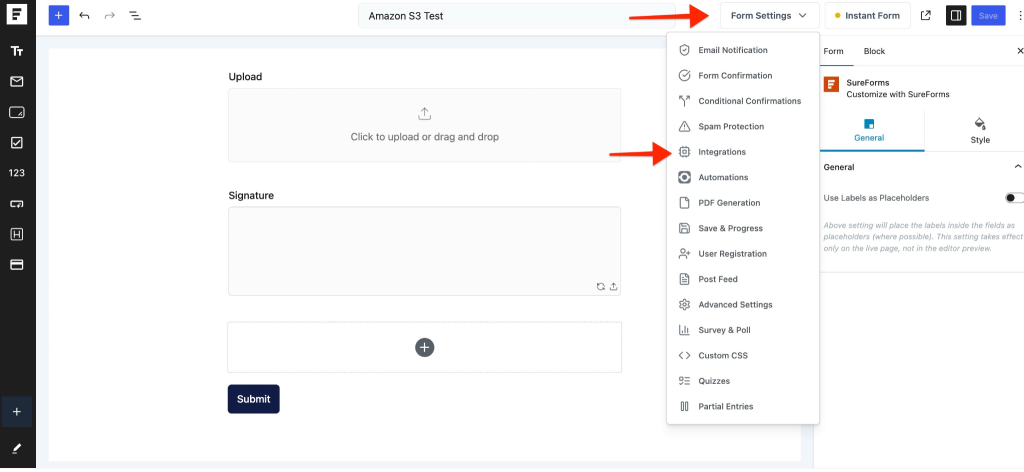
- Click Add Integration
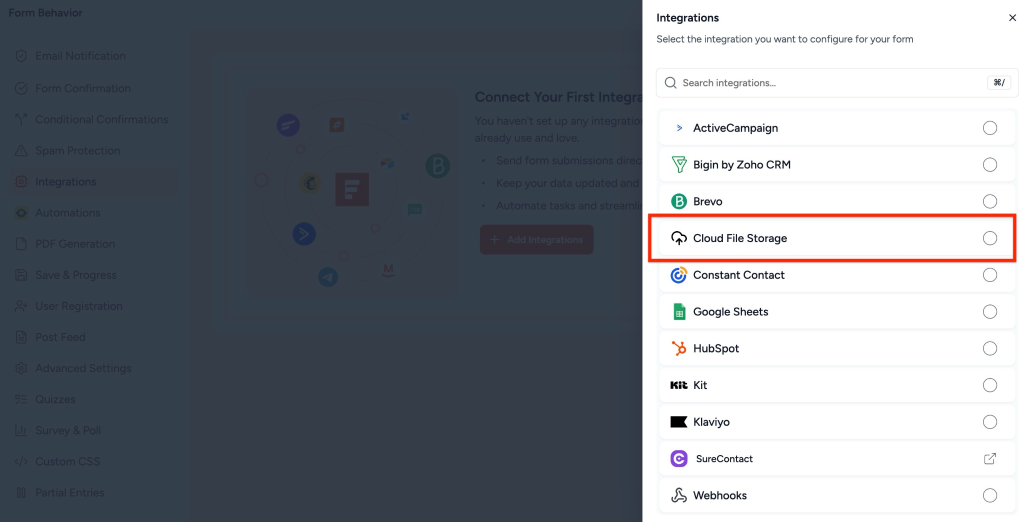
Select Cloud File Storage
- Choose Cloud File Storage from the available integrations.
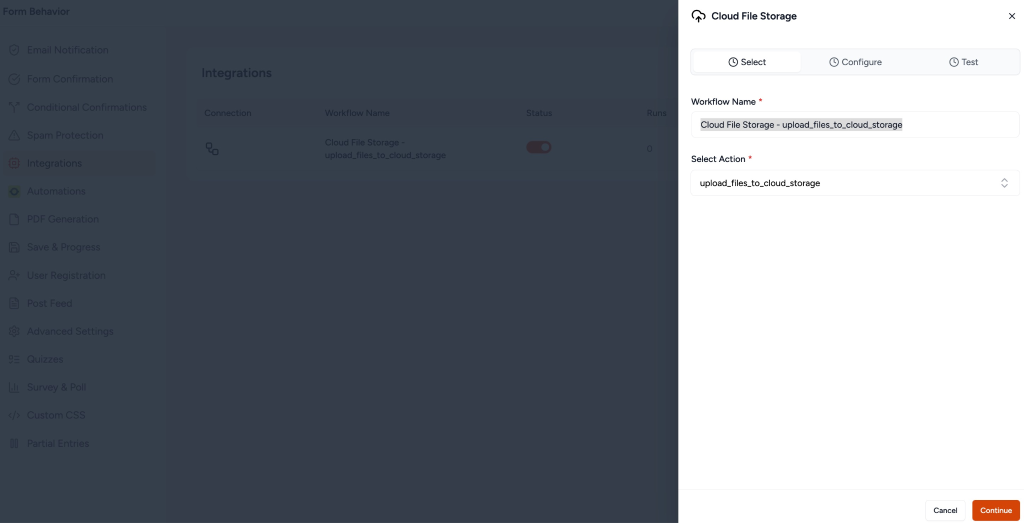
Enter a workflow name such as:
- Amazon S3 Upload
- Document Storage
- File Backup
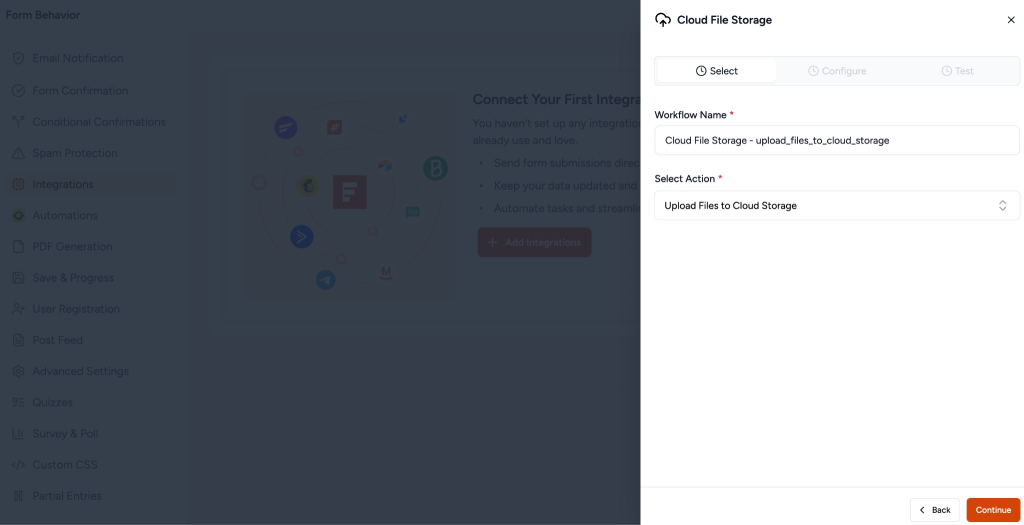
Choose the Action
- Select:Upload File to Cloud
- Click: Continue
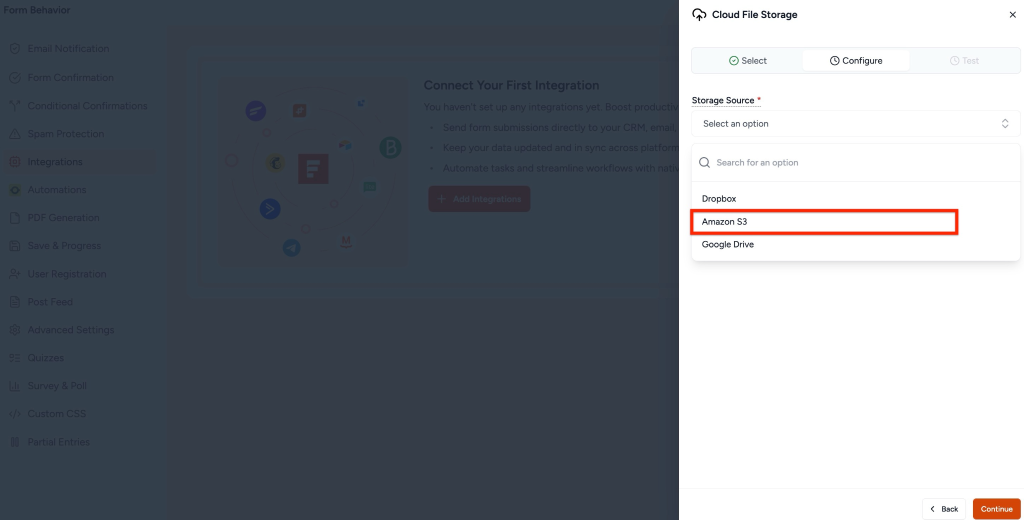
Select Amazon S3 as Storage Source
From the Storage Source dropdown:
- Select: Amazon S3
- Choose the Amazon S3 connection created earlier.
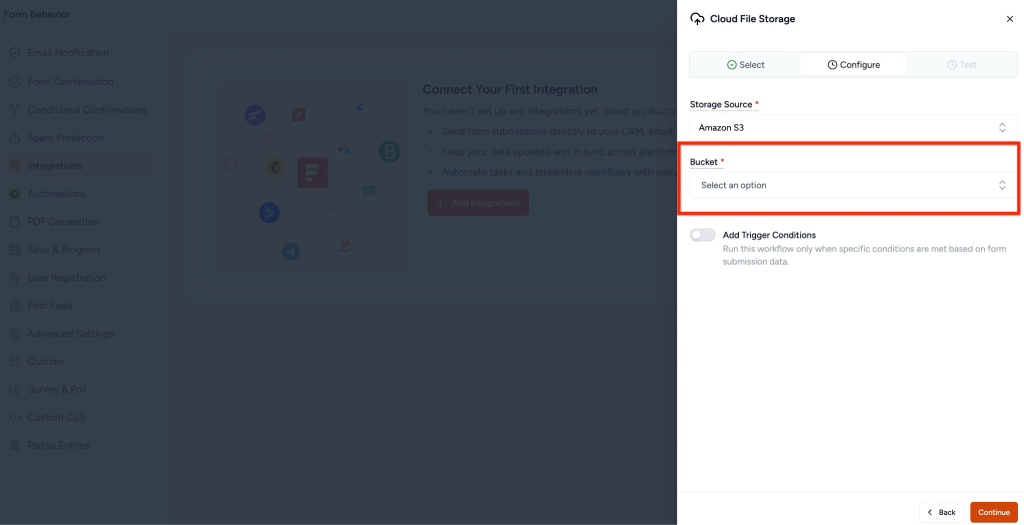
Set Bucket
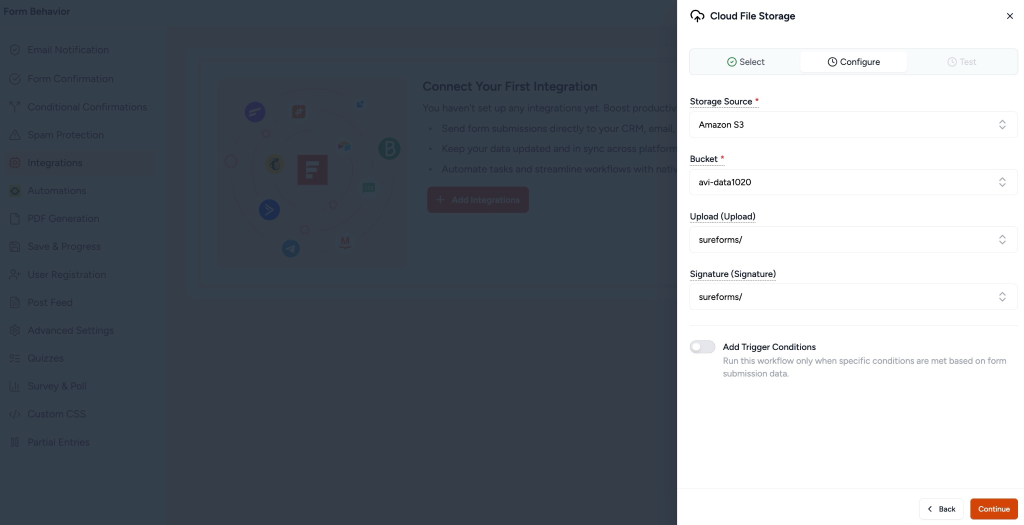
Configure Upload Folder
Choose where uploaded files should be stored.
Options include:
- Store files in the bucket root.
- Create a custom folder path.
- Organize uploads by form.
Map Upload Fields
Select which File Upload field(s) should be uploaded.
If multiple upload fields exist, choose the appropriate fields.
Map Signature Fields
If your form includes a Signature field:
- Select the signature field.
- Include it in the upload workflow.
The signature image will automatically upload when the form is submitted.
[Insert Screenshot: Signature Field Mapping]
Save the Integration
Review your configuration.
- Click:Continue or Save
- Publish or update the form.
- Your Amazon S3 upload workflow is now active.
Step 4: Test the Integration
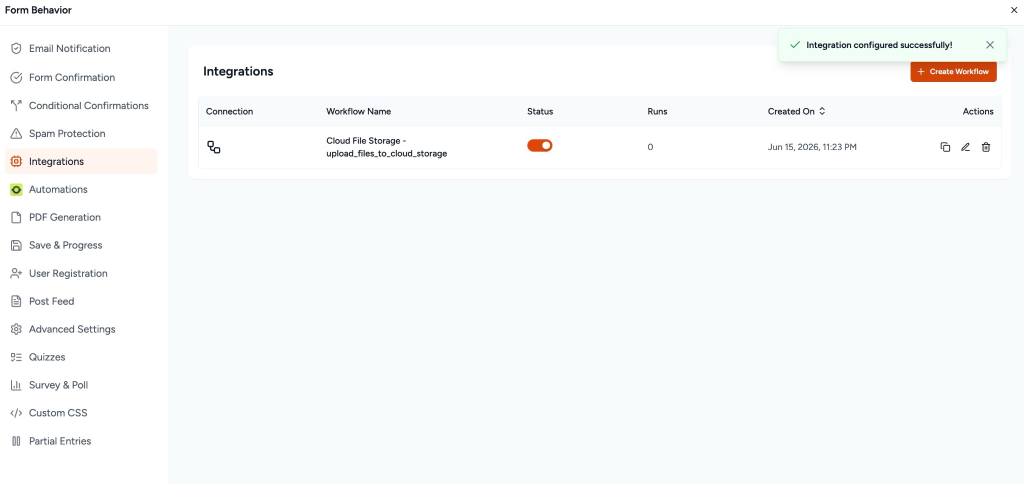
Test Workflow
- Click Test Workflow
- If successful, a confirmation message appears.
- Click Save Changes
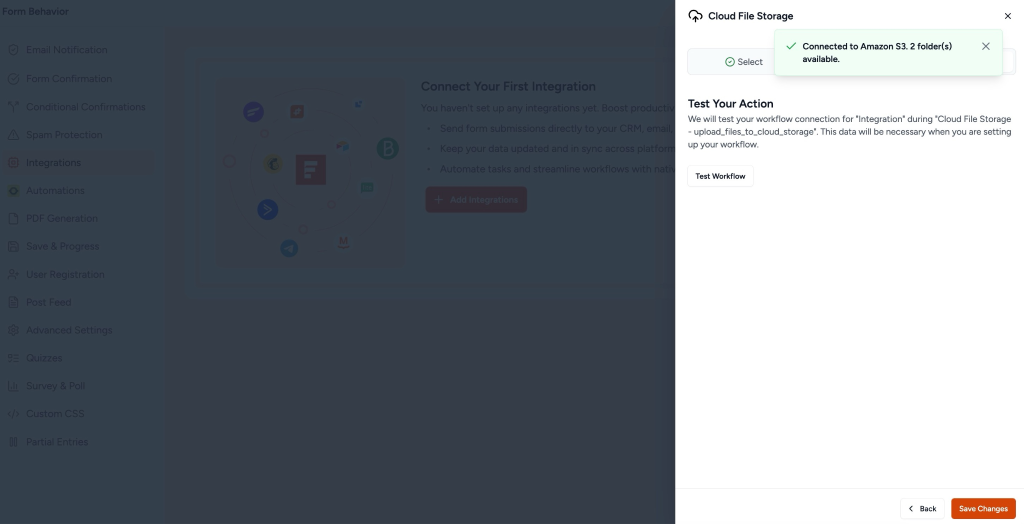
Integration Complete
Your form is now configured to upload files and signatures to Amazon S3 automatically.
Verify Successful Upload
You can confirm uploads using either method below.
Method 1: Check Amazon S3
Open your configured S3 bucket.
Verify that uploaded files and signatures appear correctly.
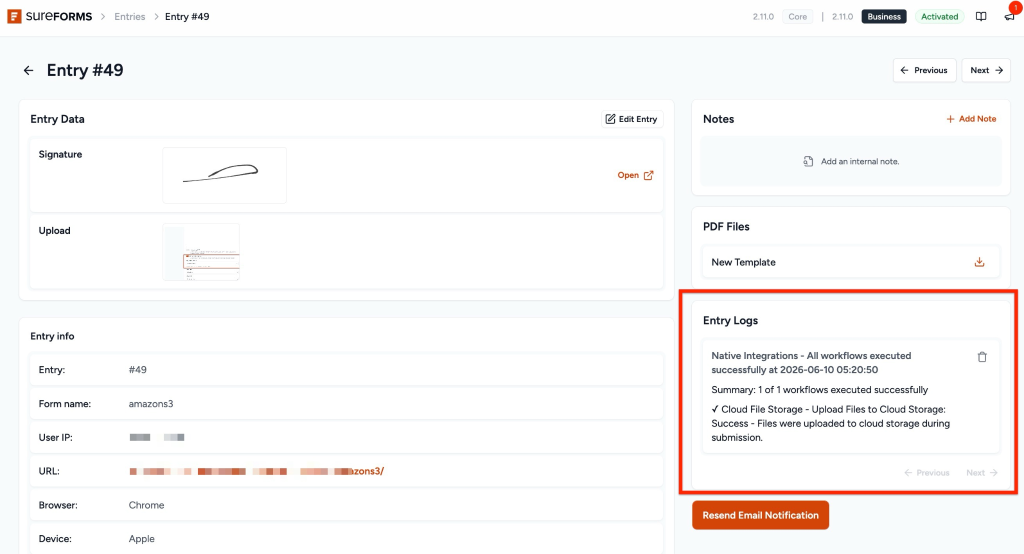
Method 2: Check Form Entries
- Navigate to: SureForms → Entries
- Open the submitted entry.
- Review the integration logs.
A successful upload message confirms the files were uploaded during submission.
Troubleshooting
Amazon S3 Connection Not Appearing
- Reconnect Amazon S3 from SureForms Settings.
- Verify Access Key and Secret Access Key.
- Confirm Bucket Name and Region.
Files Not Uploading
- Verify File Upload fields are mapped correctly.
- Confirm Cloud File Storage workflow is enabled.
- Check upload restrictions and limits.
- Verify IAM permissions allow file uploads.
Signature Not Uploading
- Ensure the Signature field is selected.
- Submit a new test entry after saving configuration changes.
Conclusion
The Amazon S3 integration allows SureForms to automatically store uploaded files and signatures directly in Amazon S3.
This reduces server storage usage, improves document organization, and creates a secure cloud-based storage workflow for form submissions.
Once configured, every new submission can automatically send selected files and signatures to Amazon S3 without manual intervention.
We don't respond to the article feedback, we use it to improve our support content.